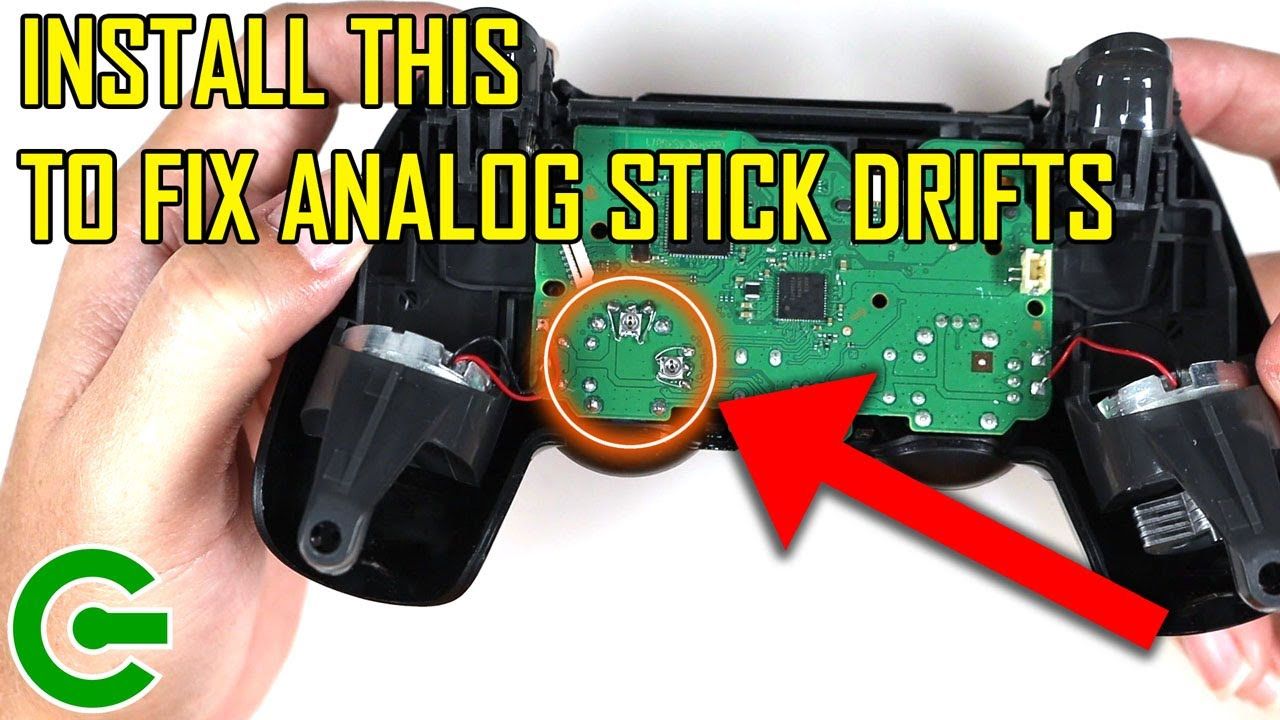
Analog stick drift is an annoying issue, and most of us think that replacing the damaged component solves the issue, but no, it is not always like that. Even we use a new analog stick, the drifting issue still occurs in some cases. Watch the guide closely on how I fixed the problem.
▬▬▬▬▬▬▬▬▬▬▬▬▬▬▬▬▬▬▬▬▬
LINKS
Gamepad tester: https://gamepad-tester.com/
▬▬▬▬▬▬▬▬▬▬▬▬▬▬▬▬▬▬▬▬▬
INGREDIENTS
– 50K Ohm SMD Potentiometer
– 0.2mm tinned copper wire
– Soldering iron and solder
– Kapton tape
– Tweezer
– Slotted screwdriver, Torx 8 screwdriver, ph00 Philips screwdriver
▬▬▬▬▬▬▬▬▬▬▬▬▬▬▬▬▬▬▬▬▬
ORIGINAL CONCEPT
https://www.youtube.com/watch?v=1yluzJre9D8
▬▬▬▬▬▬▬▬▬▬▬▬▬▬▬▬▬▬▬▬▬
TIMESTAMP
00:00 Intro
00:32 Disclaimer
00:52 Inspecting the PS4 controller
01:23 Disassemble the PS4 controller
01:50 The Pots
02:20 Soldering the pots
04:27 Calibrating the PS4 controller
06:22 Inspecting the Xbox One Controller
06:59 Disassembling the Xbox One Controller
07:42 Soldering the pots
10:31 Calibrating the Xbox One controller
12:04 Re-assemble the Xbox One controller
▬▬▬▬▬▬▬▬▬▬▬▬▬▬▬▬▬▬▬▬▬
MUSIC
https://elements.envato.com/chill-ambient-house-trance-2B9GFJS
▬▬▬▬▬▬▬▬▬▬▬▬▬▬▬▬▬▬▬▬▬
CONTACT & DONATION
https://linktr.ee/sthetixofficial
▬▬▬▬▬▬▬▬▬▬▬▬▬▬▬▬▬▬▬▬▬
CREDIT
Solderking
source

![[Xbox Series X|S] XBSX2.0 Install/BIOS/Game Setup Guide - Better PS2 Emulation For Xbox Is Here!](https://i0.wp.com/thegamepadgamer.com/wp-content/uploads/2023/05/Xbox-Series-XS-XBSX20-InstallBIOSGame-Setup-Guide-Better-PS2.jpg?resize=200%2C200&ssl=1)


![[Xbox Series X|S] PS2 Emulation Setup Guide (XbSX2.0) - Dev Mode](https://i0.wp.com/thegamepadgamer.com/wp-content/uploads/2022/06/Xbox-Series-XS-PS2-Emulation-Setup-Guide-AetherSX2-Dev.jpg?resize=200%2C200&ssl=1)